SAP IDES is a software package that enables you to test and develop SAP applications. Installing SAP IDES for practice is a great way to gain experience with the software and its features.
This article will show you how to install SAP IDES for practice on your computer. Let’s get started!
What are SAP IDES?
This is an acronym that stands for an Internet Demonstration and Evaluation System. SAP AG produces it for educational and training purposes. SAP IDES includes business operations that make it simple for customers or experts to get to know SAP or the SAP ERP system in more depth.
SAP IDES is a demo/evaluation version of the SAP software. It allows users to explore how SAP software works without worrying about license fees or maintenance costs. Installing SAP IDES can be a great way to learn about the inner workings of the world’s most popular enterprise resource planning (ERP) software.
The latest version of SAP IDES (as of this writing) is SAP ECC 6.0. This tutorial will show you how to install SAP IDES on your computer so that you can begin exploring its features and functionality.
You’ll need a few things before you begin installing SAP IDES, like a computer with at least 4 GB of RAM and a processor speed of 2 GHz or higher, a minimum of 1GB free memory, 300 MB disc space, etc.
Steps to Install SAP IDES for Practice
Part 1: SAP GUI Installation
Step 1: Installing SAP IDE is as simple as downloading and unzipping the software.
Step 2: Locate SetupAll.exe in the extracted directory and double-click to run it.
Open SetupAll.exe by double-clicking it. Whether a popup asks you if you want to continue, say yes.
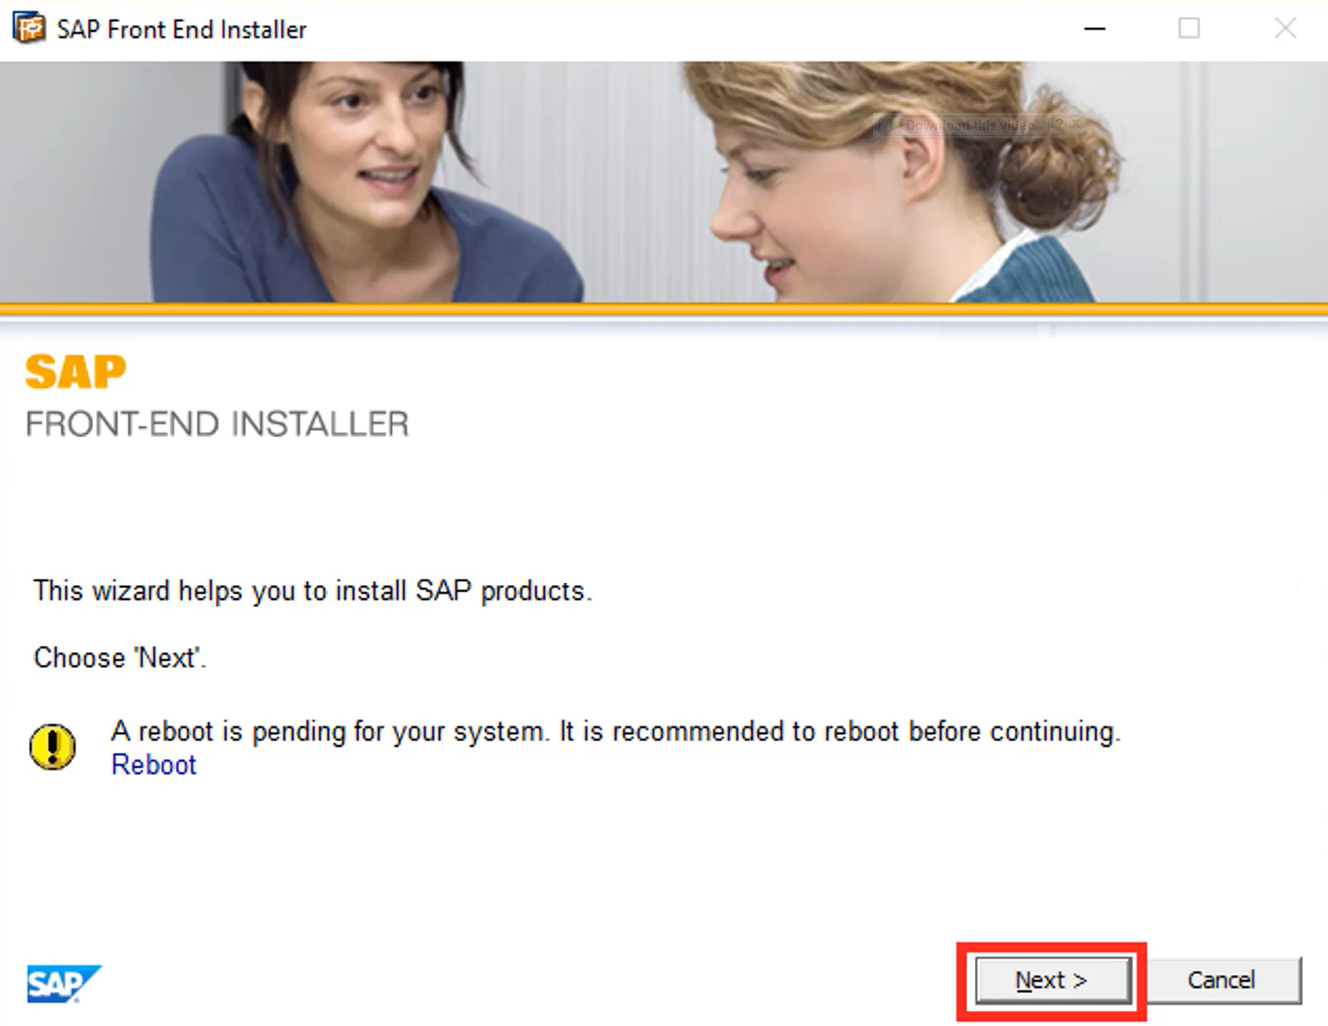
Step 3: Once the Front End Installer has been opened, click Next to continue with the installation process.
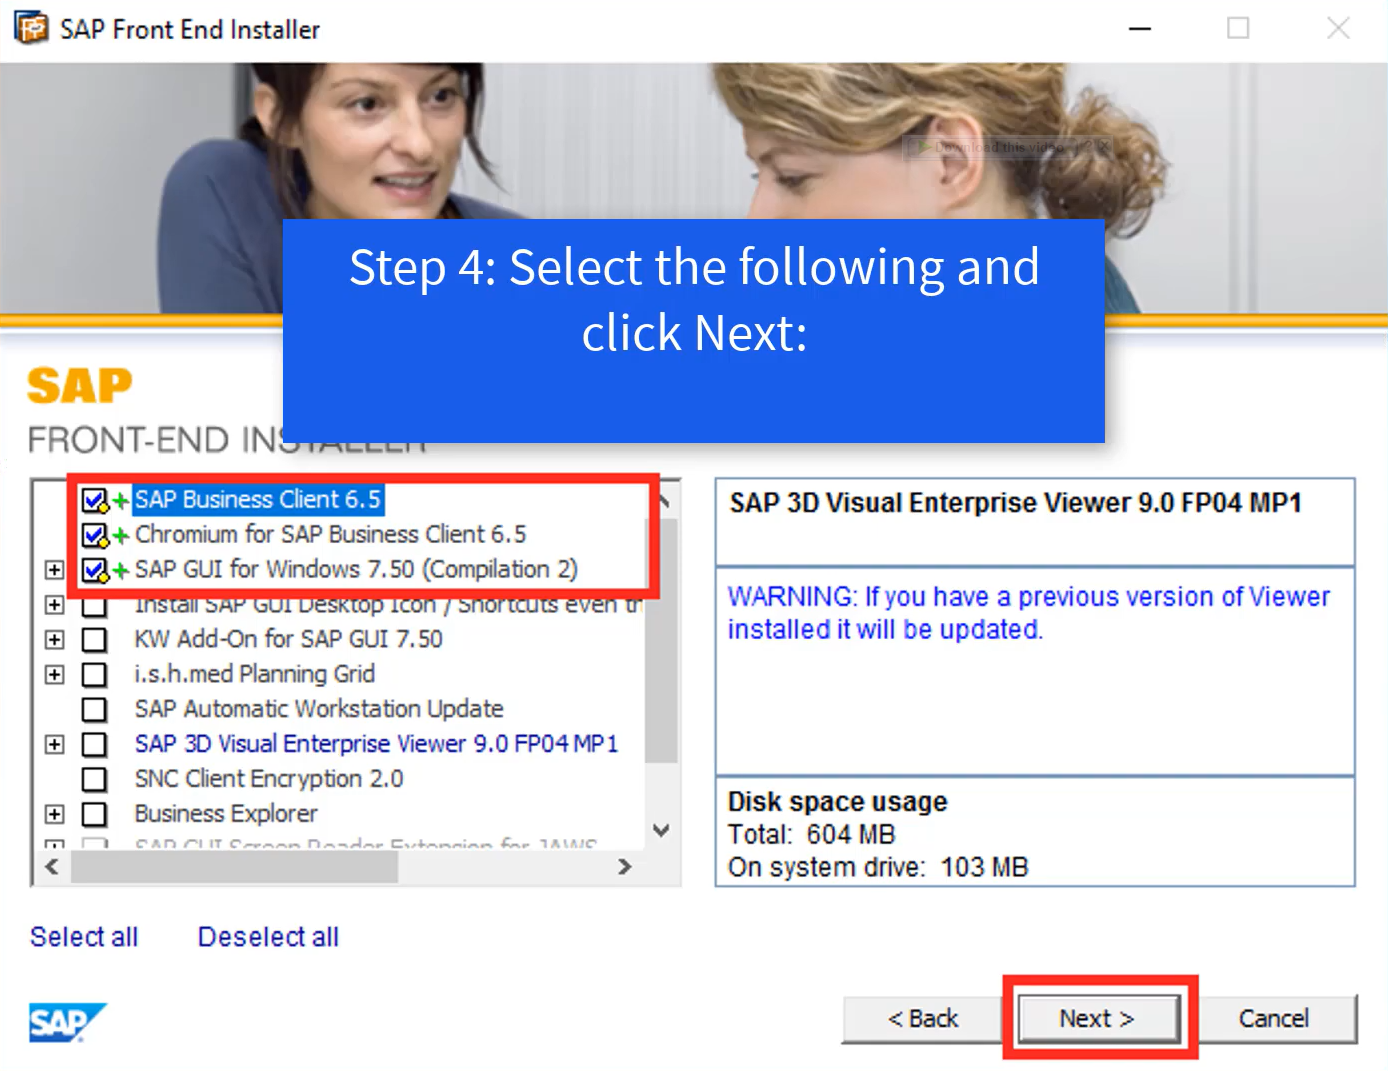
Step 4: Choose these options given below and press Next:
Step 5: A default gateway will be provided as:
“C: Program Files (x86)SAP.”
Pick the route by clicking Browse and Specify the path or by just clicking Next if you don’t want to modify it.
Step 6: Wait for the SAP IDES installer to complete the installation of all the necessary components.
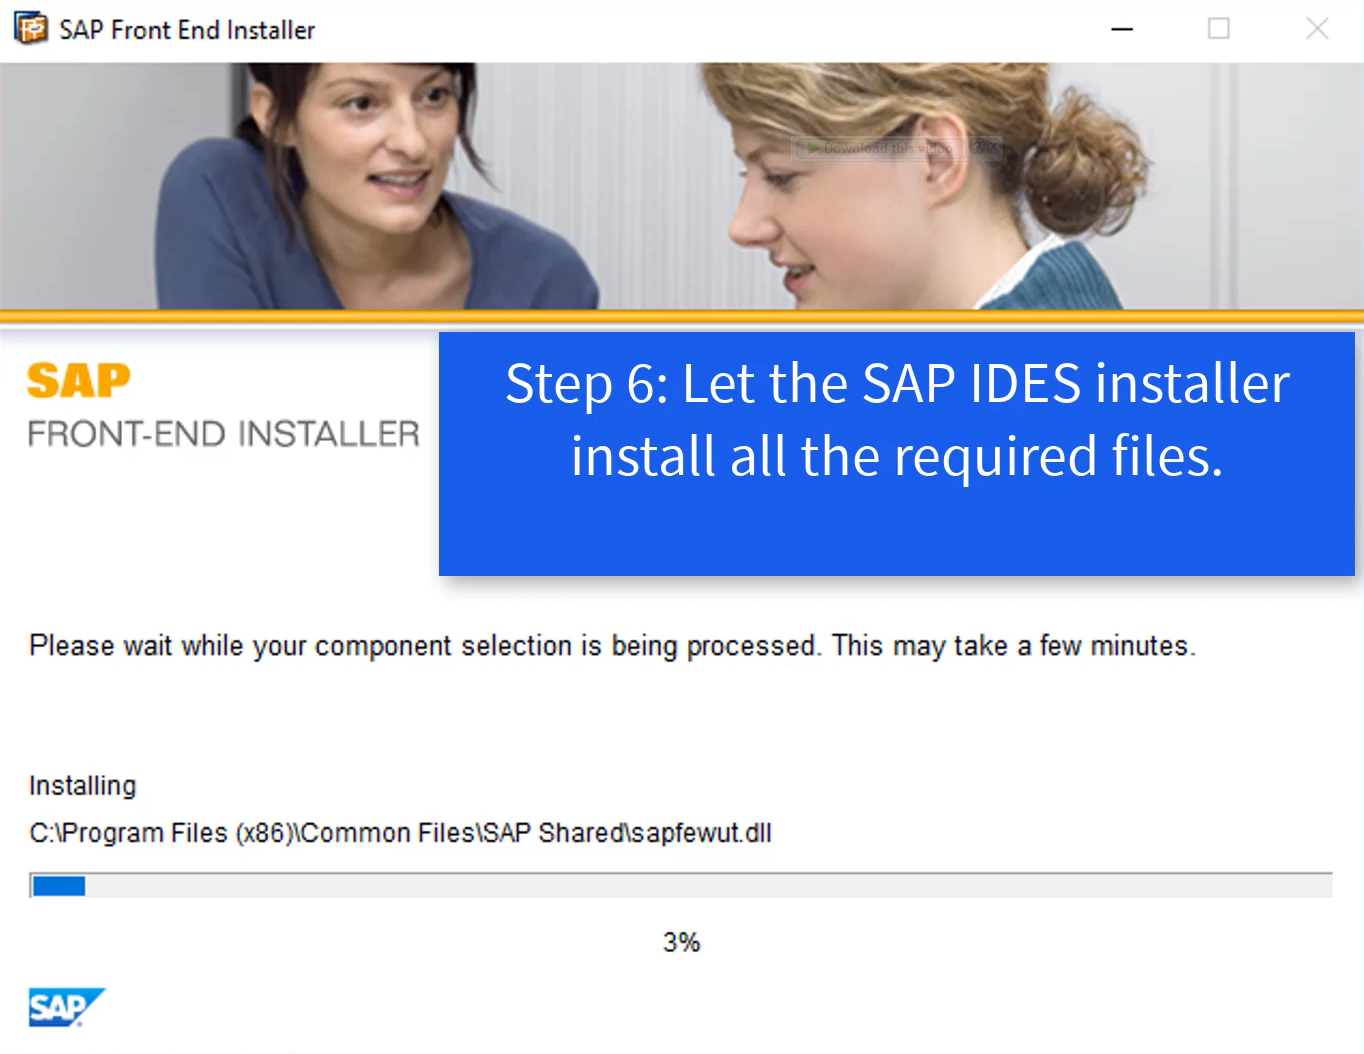
Step 7: When the setup is finished, click the close button.
You are now familiar with How to Install Free SAP IDES, but in order to understand how to configure it, go to the following approach.
Part 2: SAP GUI PATCH Installation
Step 1: Simply download the SAP GUI patch and then double-click it to begin the installation process.
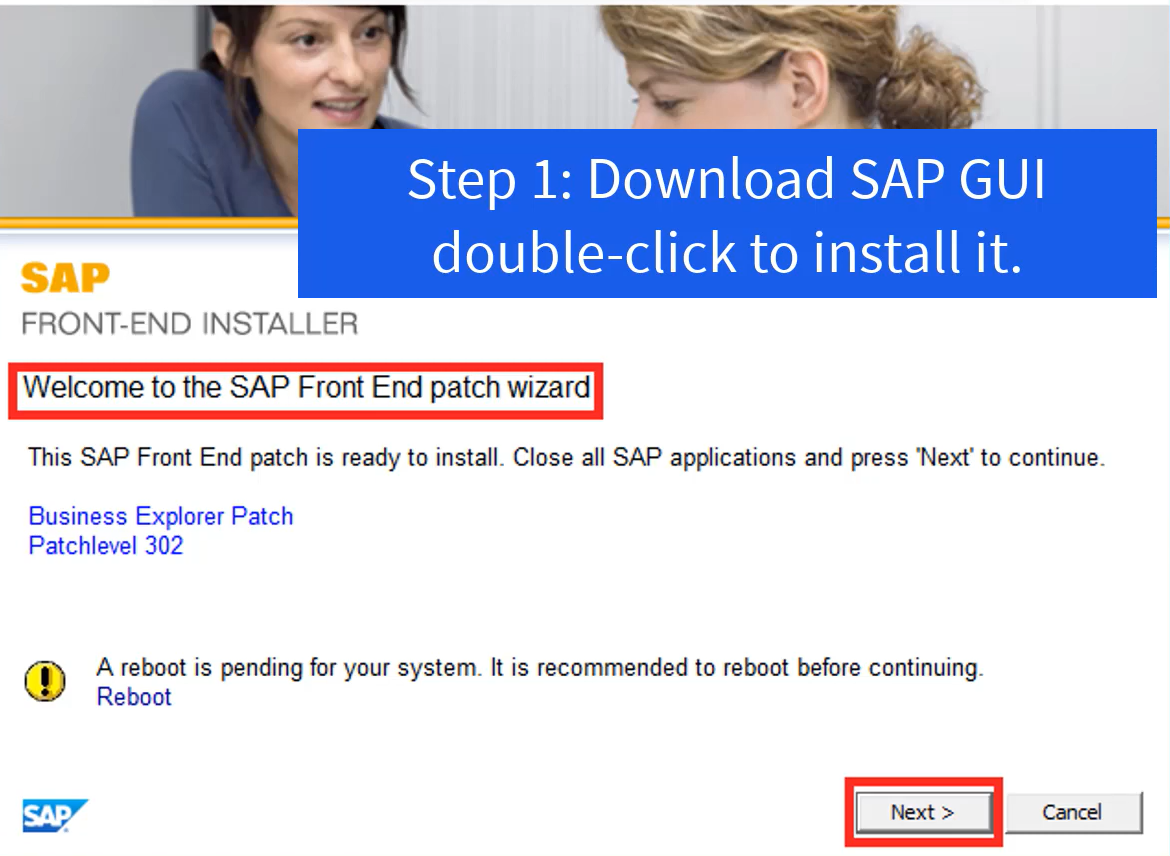
Step 2: Wait for the installation to complete.
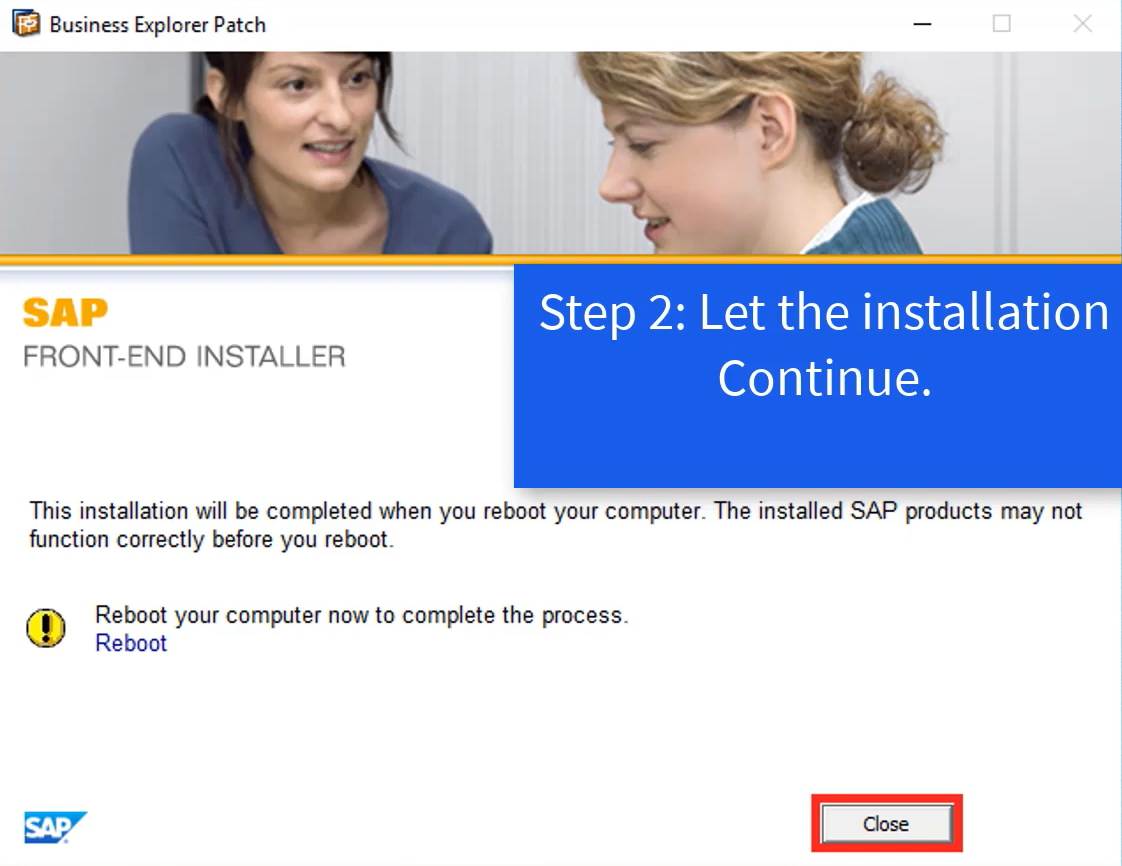
Step 3: Click Close after you’re done installing.
Part 3: SAP Hot Fix Installation
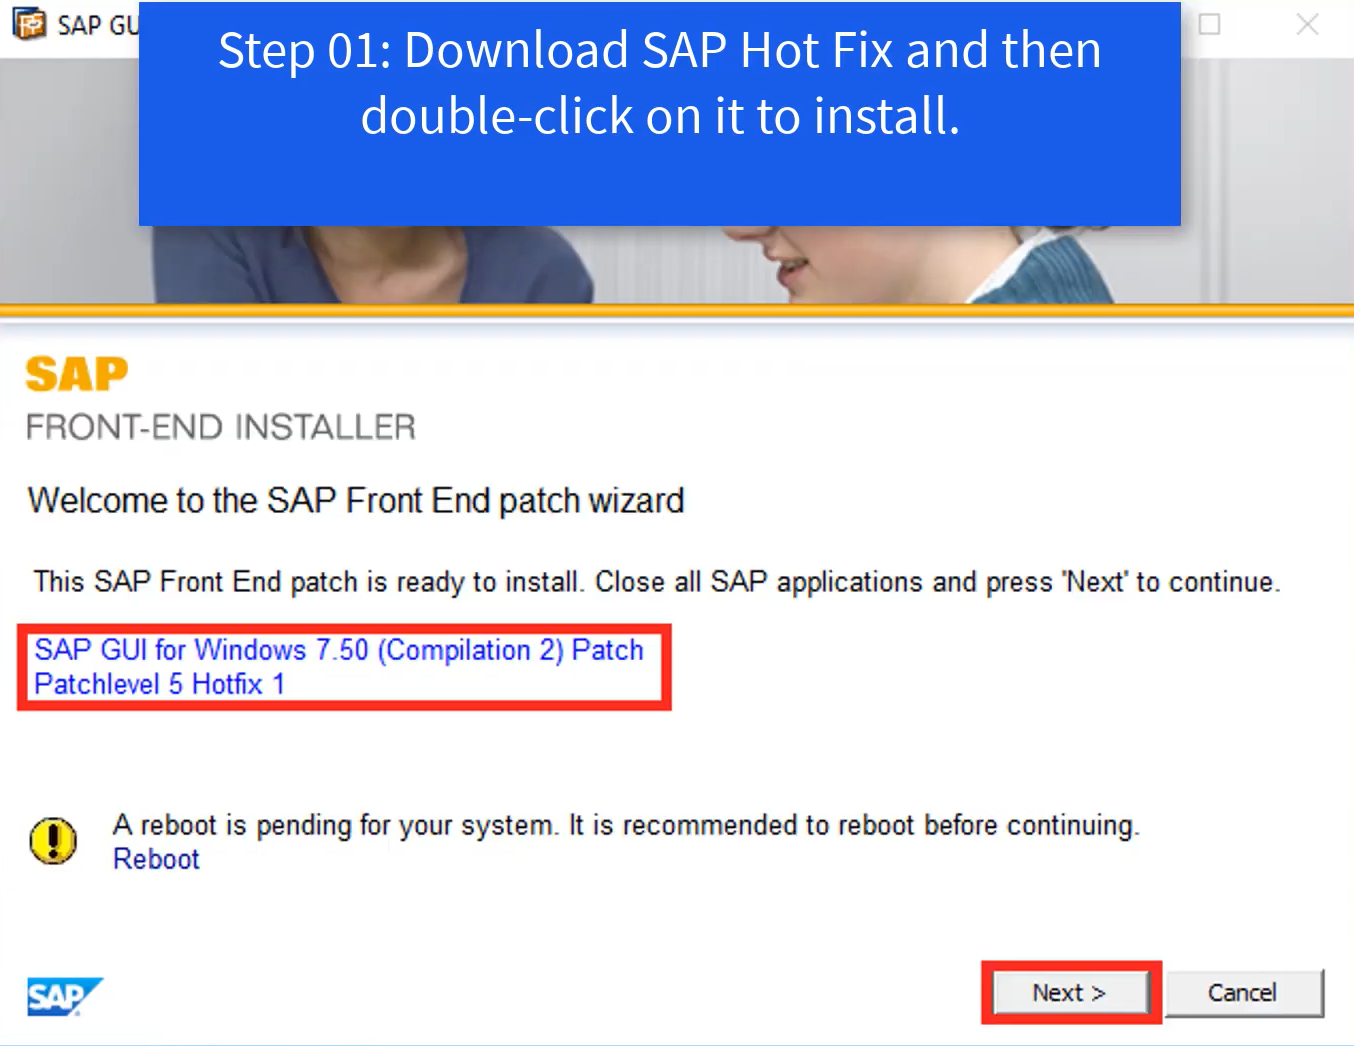
Step 1: The first step is to download the SAP Hot Fix. After downloading it, double-click on it to begin the installation.
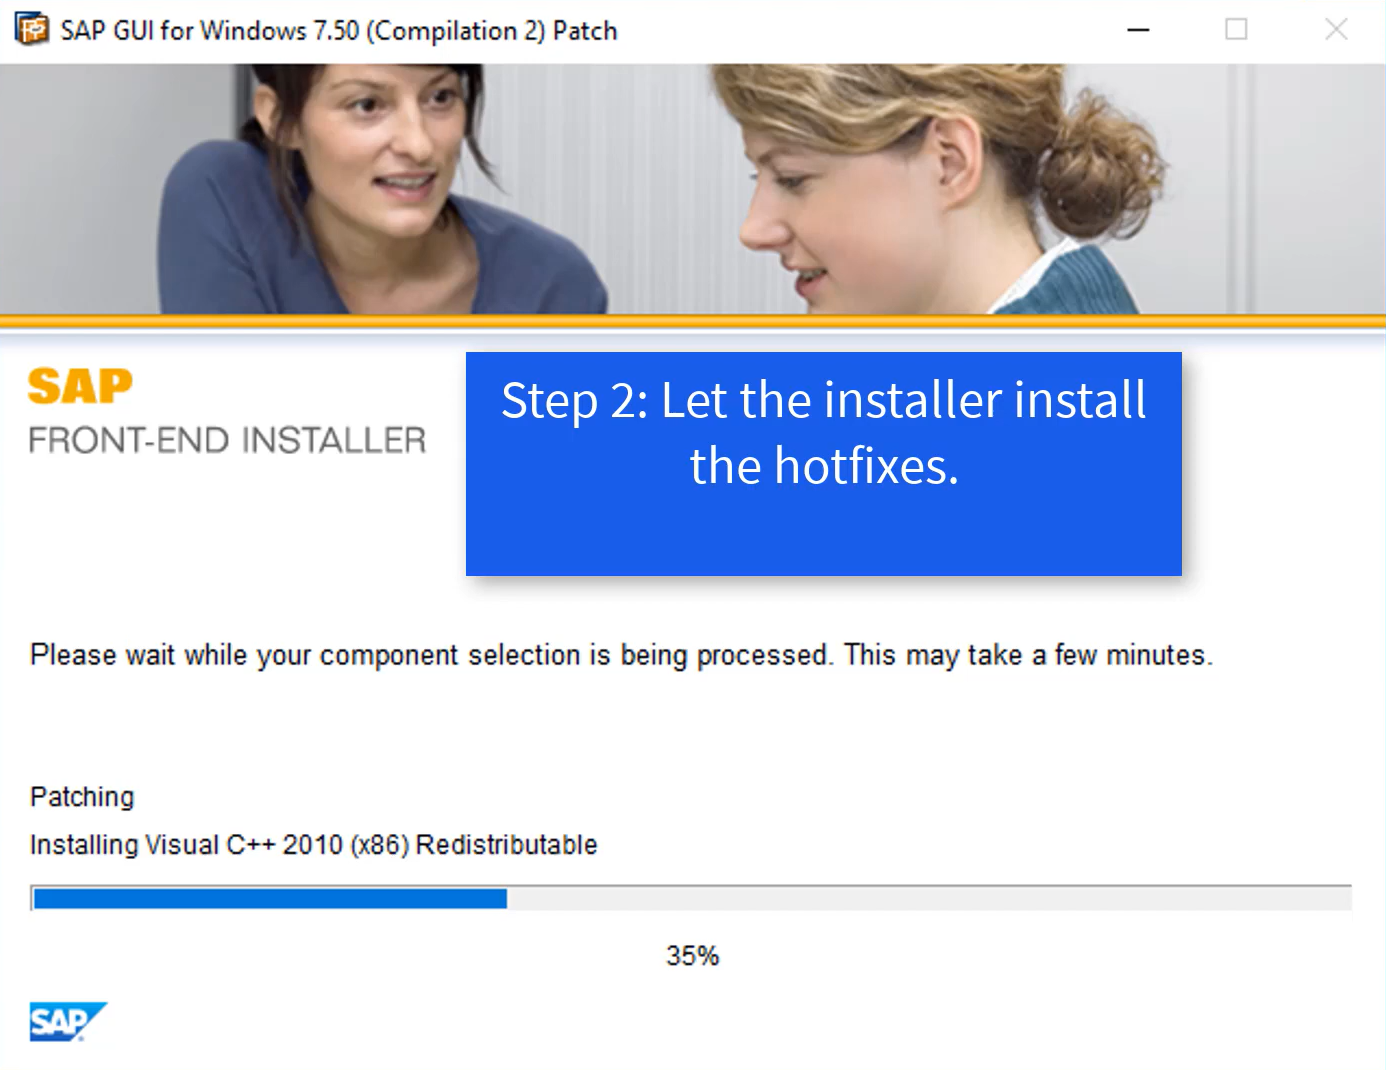
Step 2: Allow the hotfix installation to be completed.
Step 3: It’s time to close the application.
Part 4: SAP Logon Configuration
Step 1: Once the previous steps have been performed, open the Start Menu and look for SAP Logon.
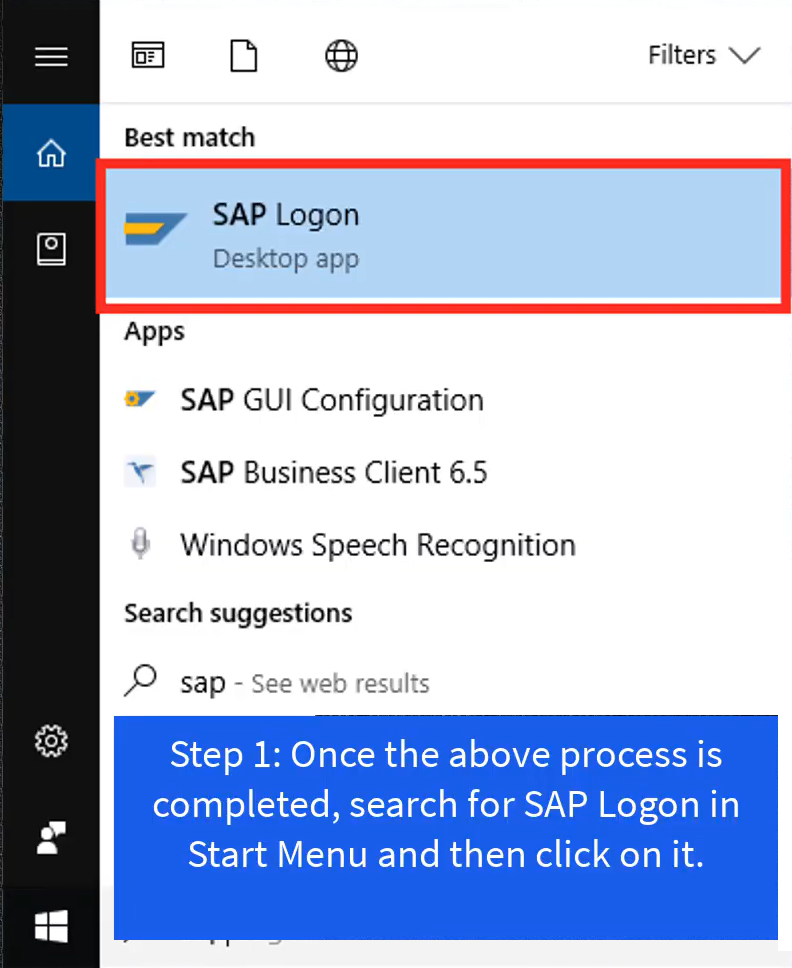
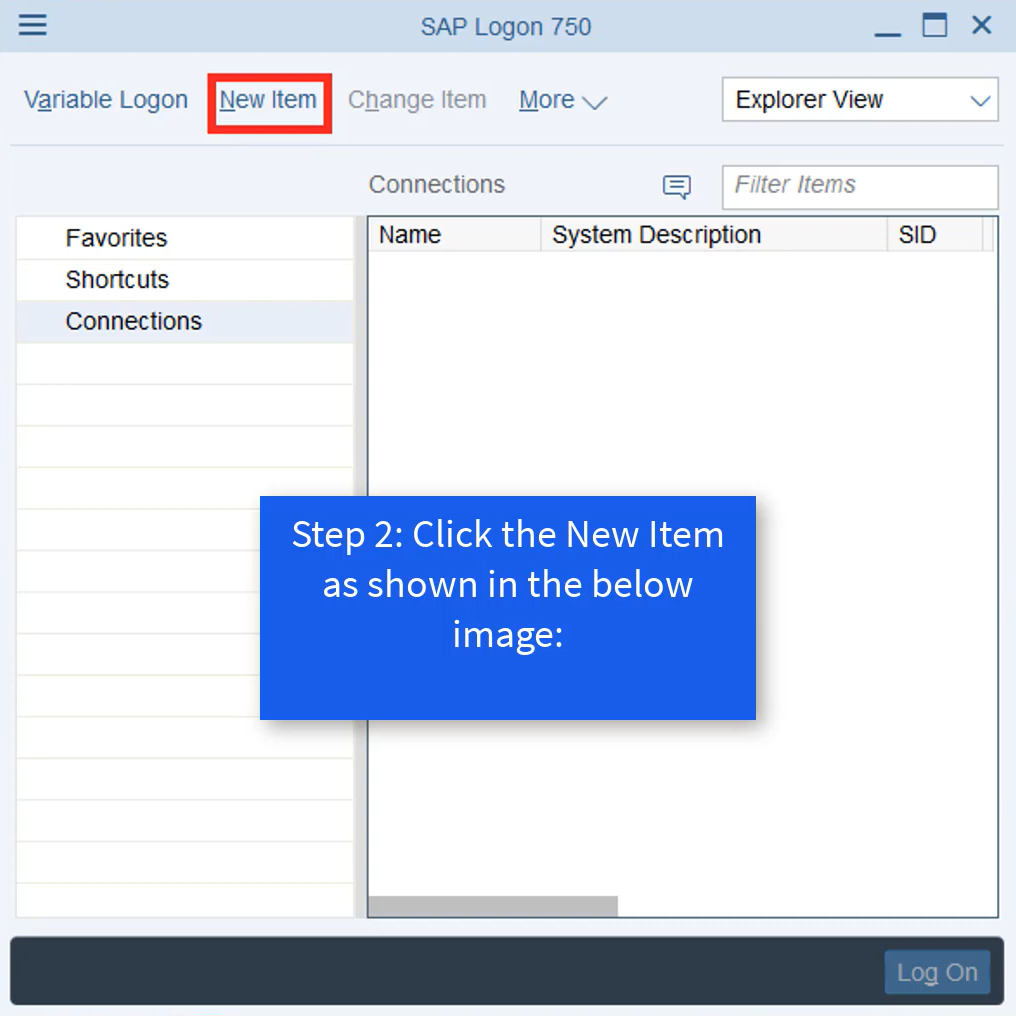
Step 2: Using the picture below, choose the New Item option.
Step 3: Hit Next after selecting “User Specified System.”
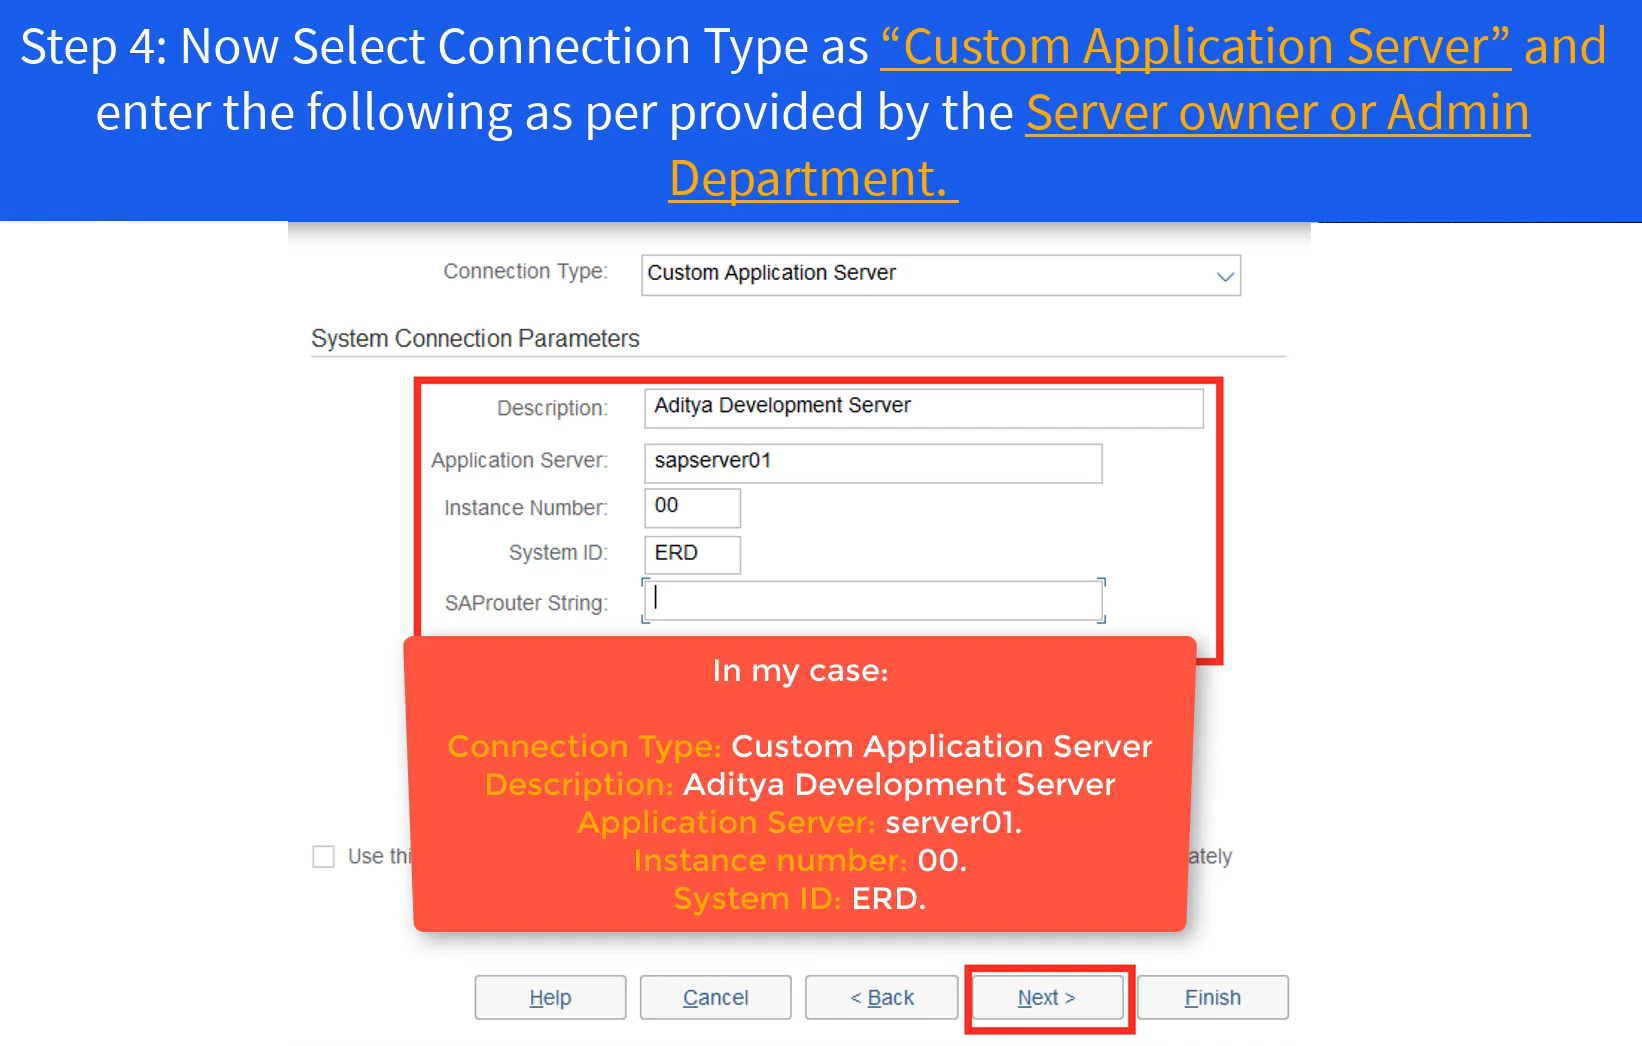
Step 4: Choose “Custom Application Server” from the drop-down menu, and input the following information as supplied by the server operator or the administrator.
You may now proceed by clicking Next.
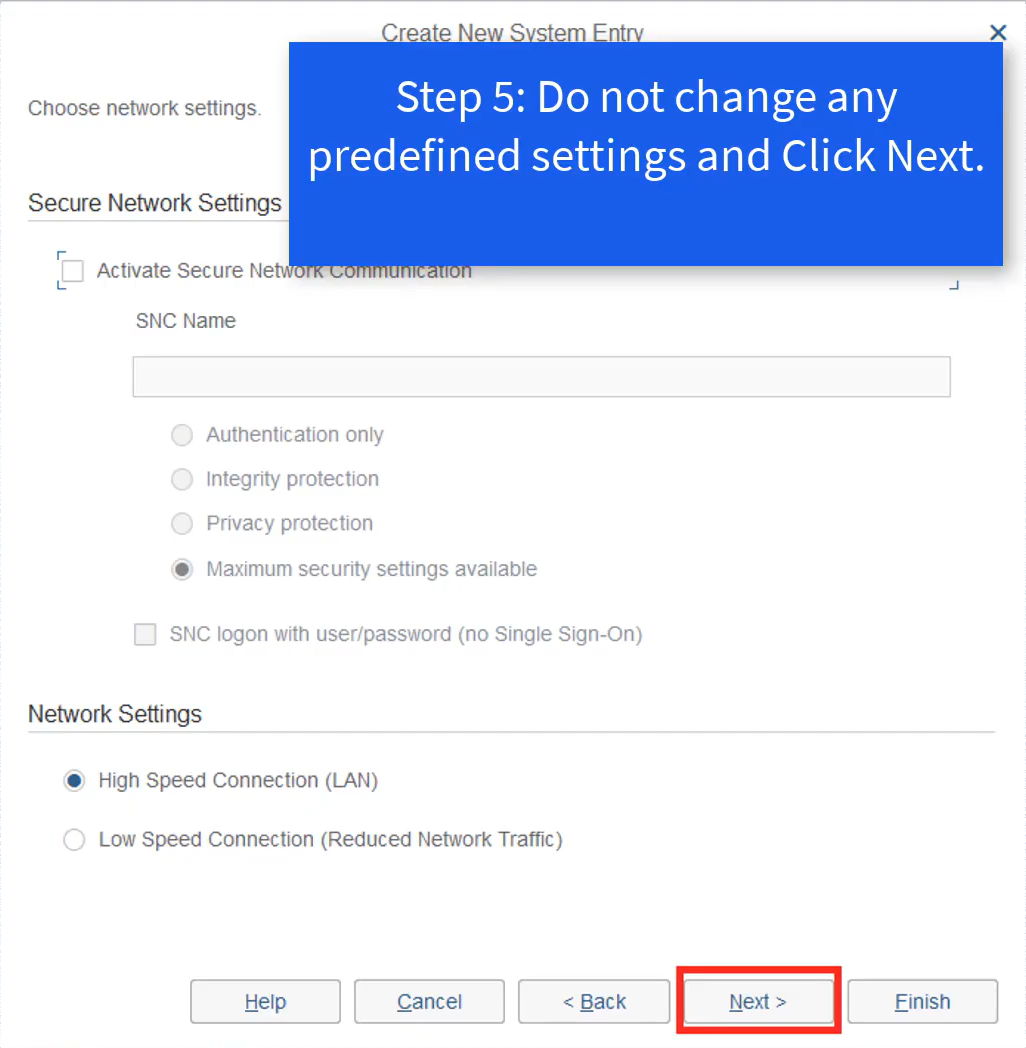
Step 5: Use the default parameters and click Next at this point.
Step 6: There should be no changes made to the connection settings between the SAP GUI and the Application Server; just click the Next button.
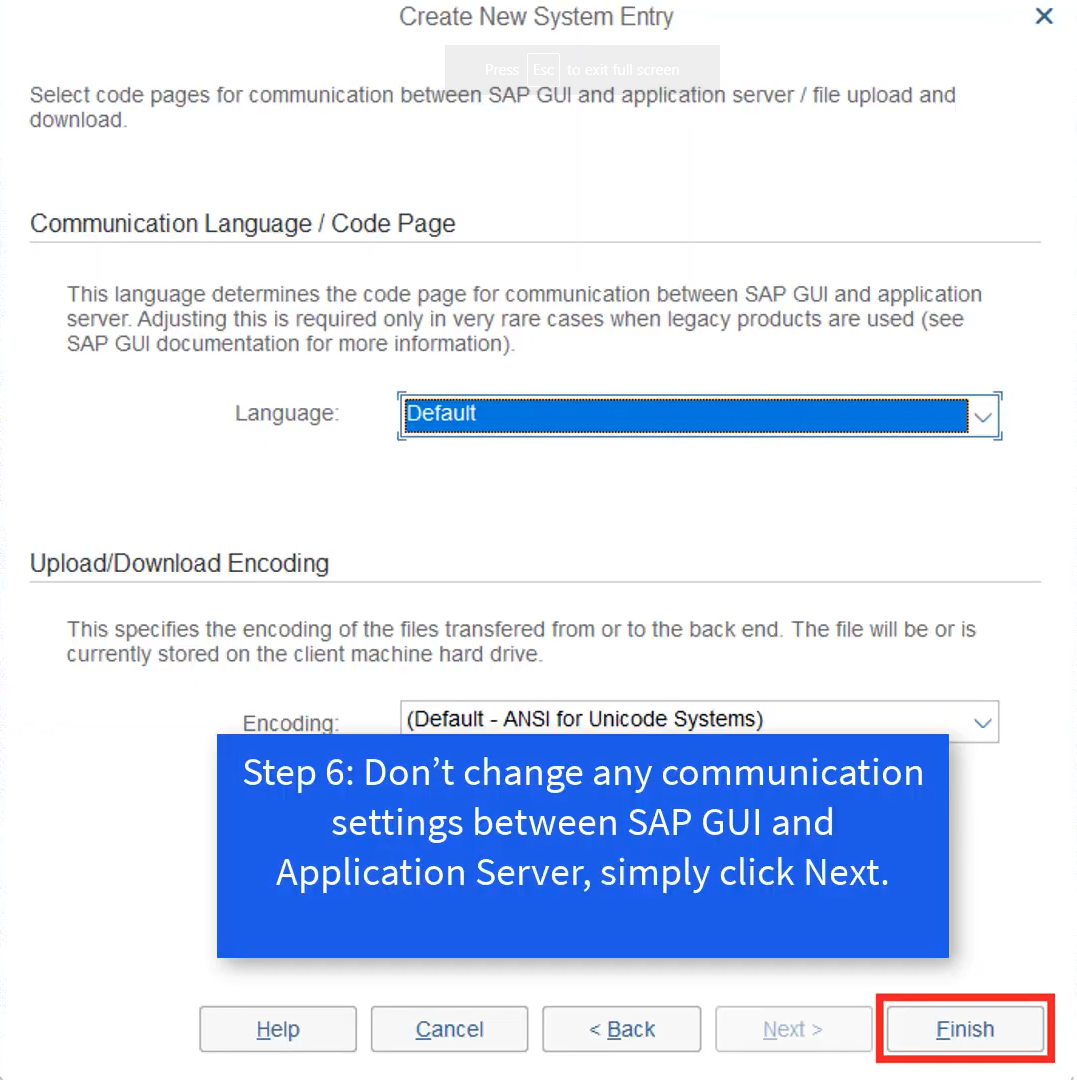
Step 7: Finally, you’ve mastered the Free SAP IDES Installation. To finish, all you need to do is click the Connection button that you just made, and then you can get started coding.
Your SAP IDES system should now be up and running!


Leave a Reply