It’s reassuring to know that we’ve managed to imbue robots with our innate abilities to learn by example and perceive their surroundings. The fundamental challenge is those teaching computers to “see” like humans would need far more time and effort.
However, when we consider the practical value that this skill currently provides to organizations and enterprises, the effort is worthwhile. In this article, you’ll learn about image classification, how it works, and its practical implementation. Let’s begin.
What is image classification?
The job of feeding an image into a neural network and having it output some form of label for that picture is known as image recognition. The network’s output label will correspond to a pre-defined class.
There might be numerous classes assigned to the picture, or simply one. When there is only one class, the term “recognition” is frequently used, whereas when there are multiple classes, the term “classification” is frequently used.
Object detection is a subset of picture classification in which particular instances of objects are detected as belonging to a given class such as animals, vehicles, or humans.
How does image classification work?
An image in the form of pixels is analyzed by a computer. It accomplishes this by treating the picture as a collection of matrices, the size of which is determined by the image resolution. Simply speaking, picture classification is the study of statistical data utilizing algorithms from a computer’s perspective.
Image classification is accomplished in digital image processing by grouping pixels into predetermined groups, or “classes.” The algorithms divide the image into a succession of noteworthy characteristics, which reduces the burden for the final classifier.
These qualities inform the classifier about the image’s meaning and potential classification. Because the rest of the processes in classifying a picture are dependent on it, the characteristic extraction method is the most critical phase.
The data provided to the algorithm is also crucial in image classification, especially supervised classification. In comparison to a terrible dataset with data imbalance based on class and low picture and annotation quality, a well-optimized classification dataset performs admirably.
Image classification using Tensorflow & Keras in python
We will be using the CIFAR-10 dataset (which includes aircraft, airplanes, birds, and other 7 things).
1. Installing Requirements
The code below will install all of the prerequisites.

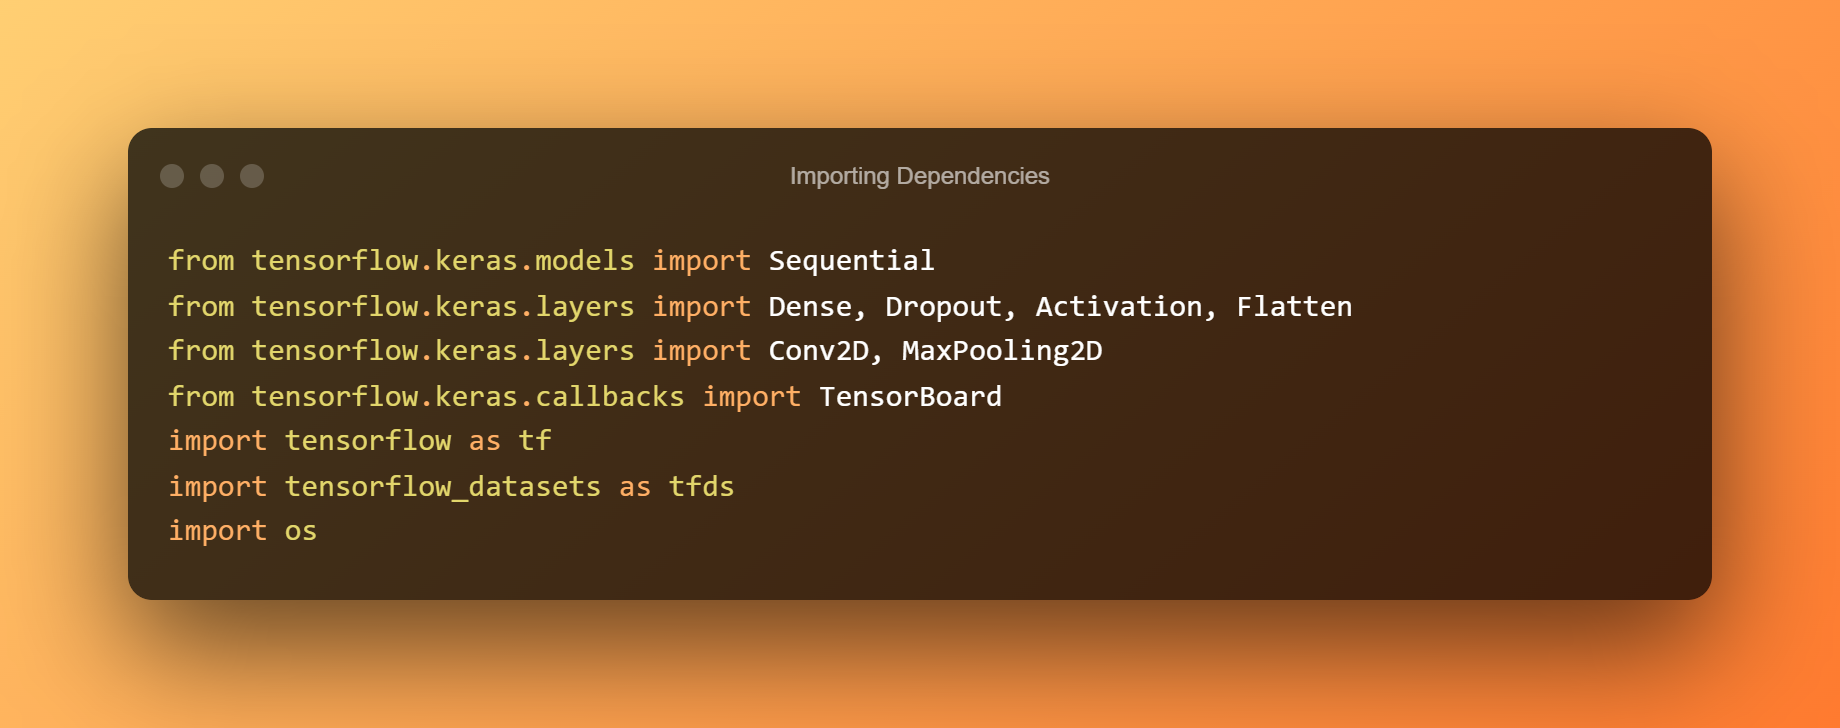
2. Importing dependencies
Make a train.py file in Python. The code below will import Tensorflow and Keras dependencies.
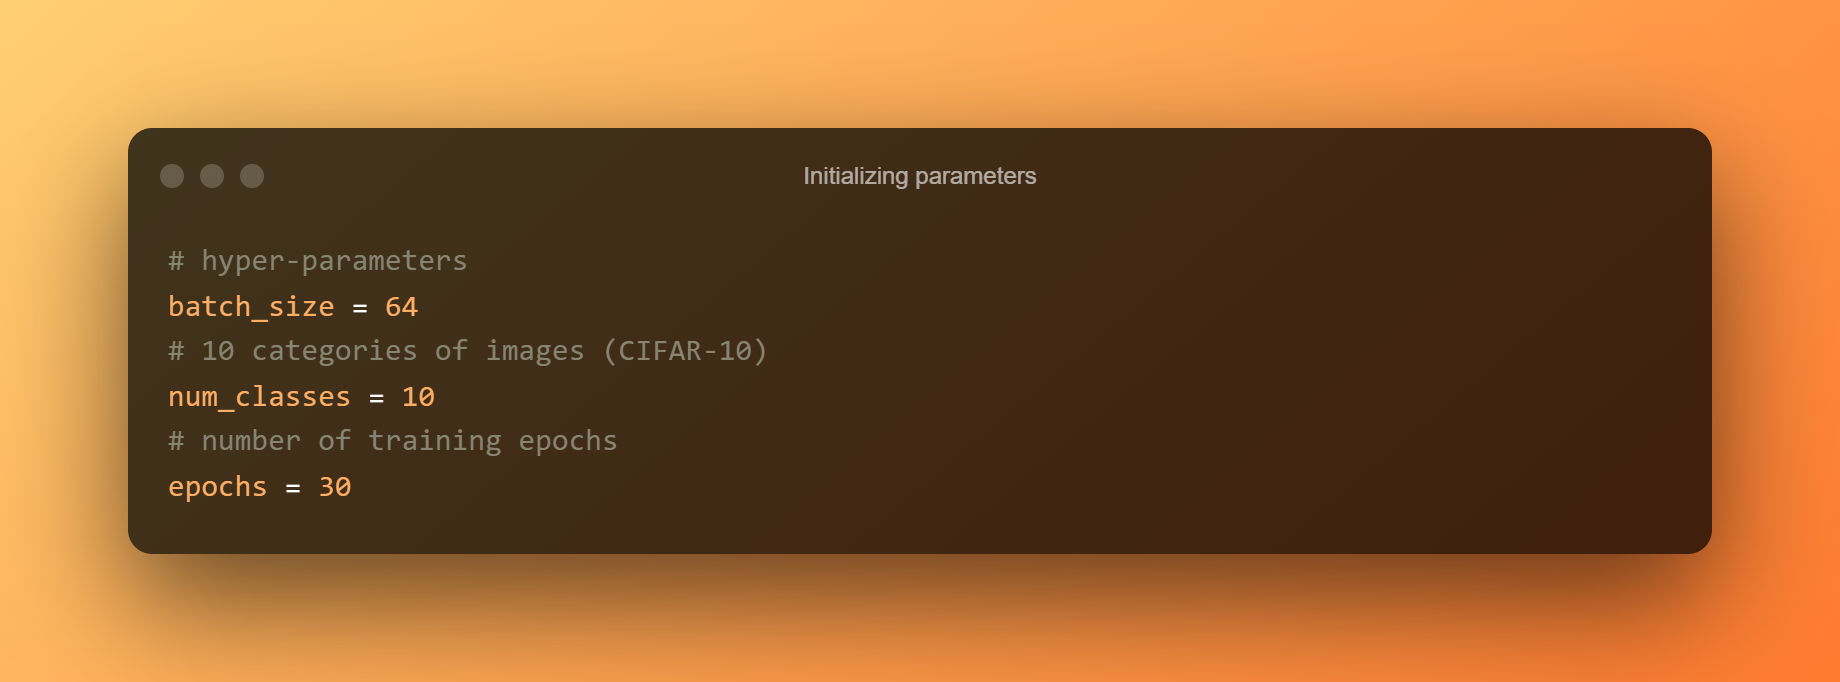
3. Initializing parameters
CIFAR-10 includes just 10 picture categories, hence num classes simply refer to the number of categories to classify.
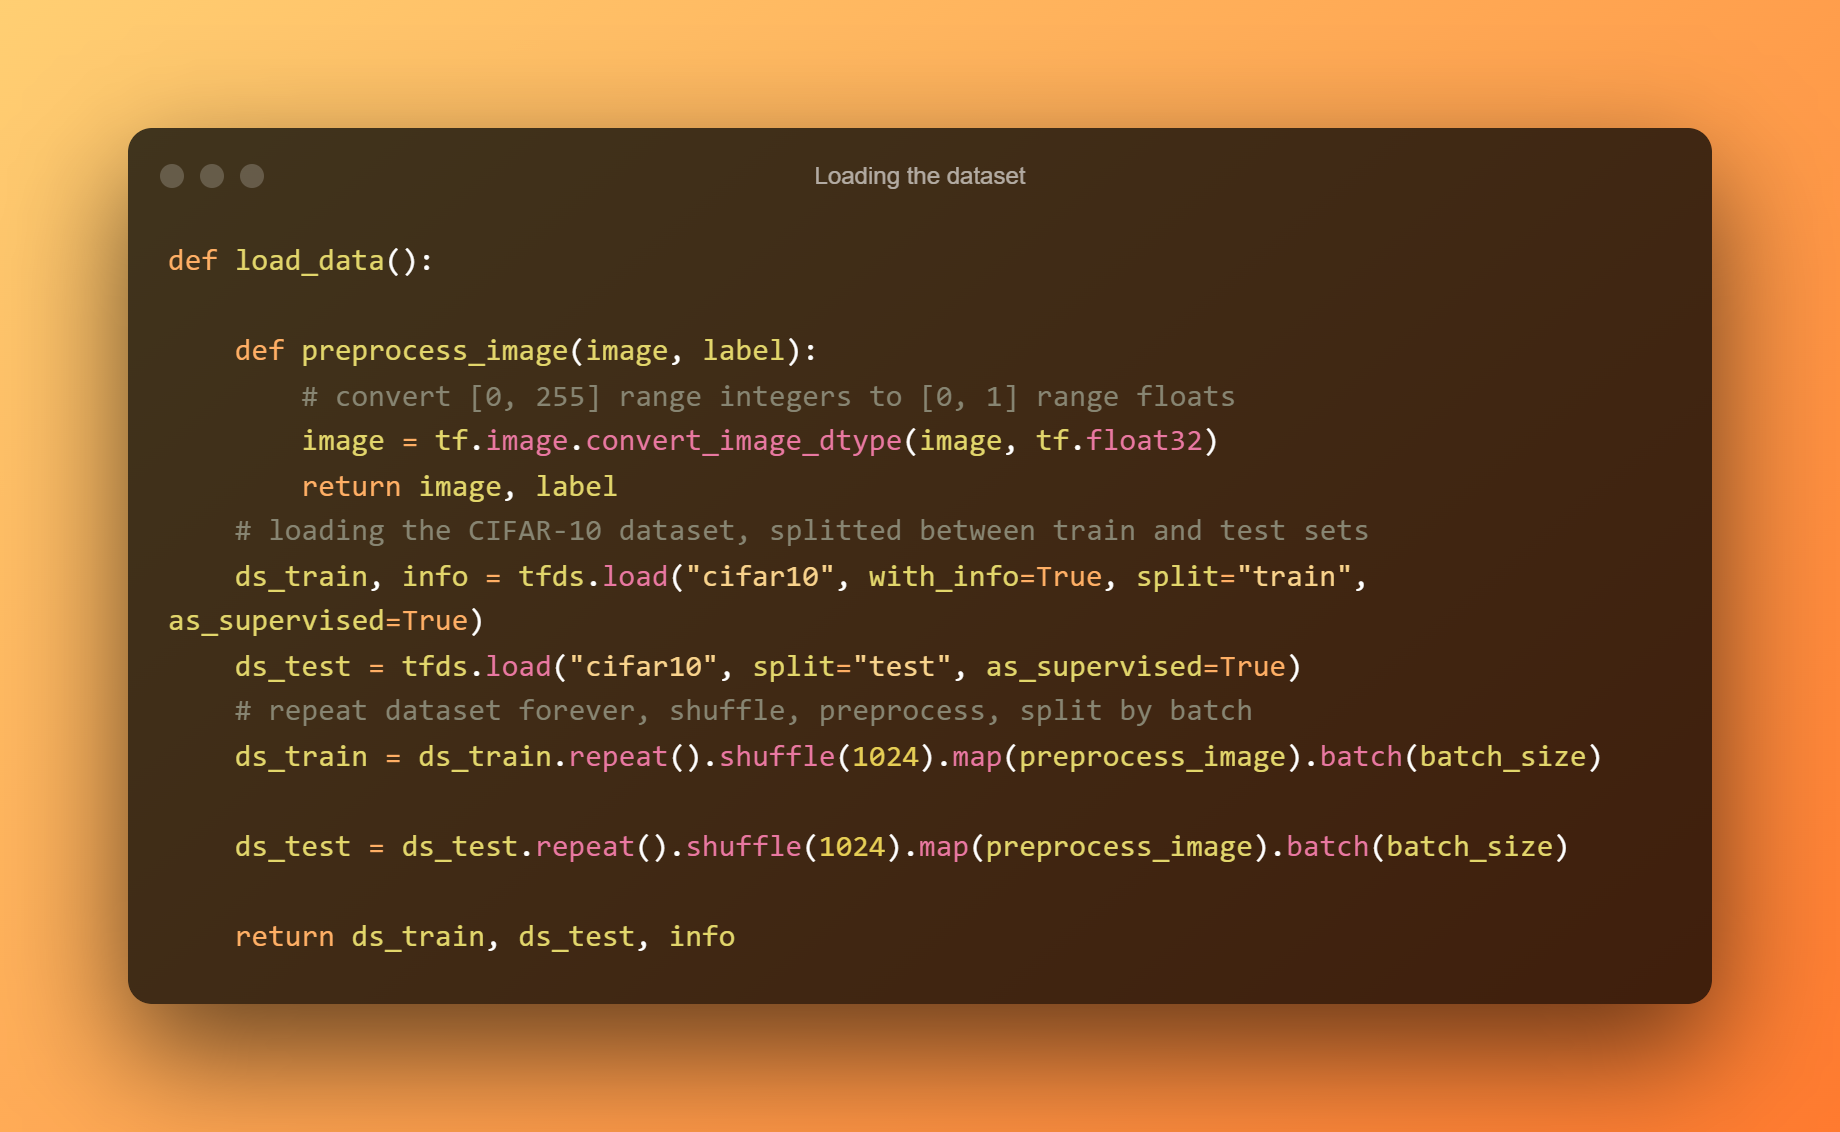
4. Loading the dataset
The function uses the Tensorflow Datasets module to load the dataset, and we set with info to True to obtain some information about it. You can print it out to see what fields and their values are, and we’ll use the info to retrieve the number of samples in the training and testing sets.
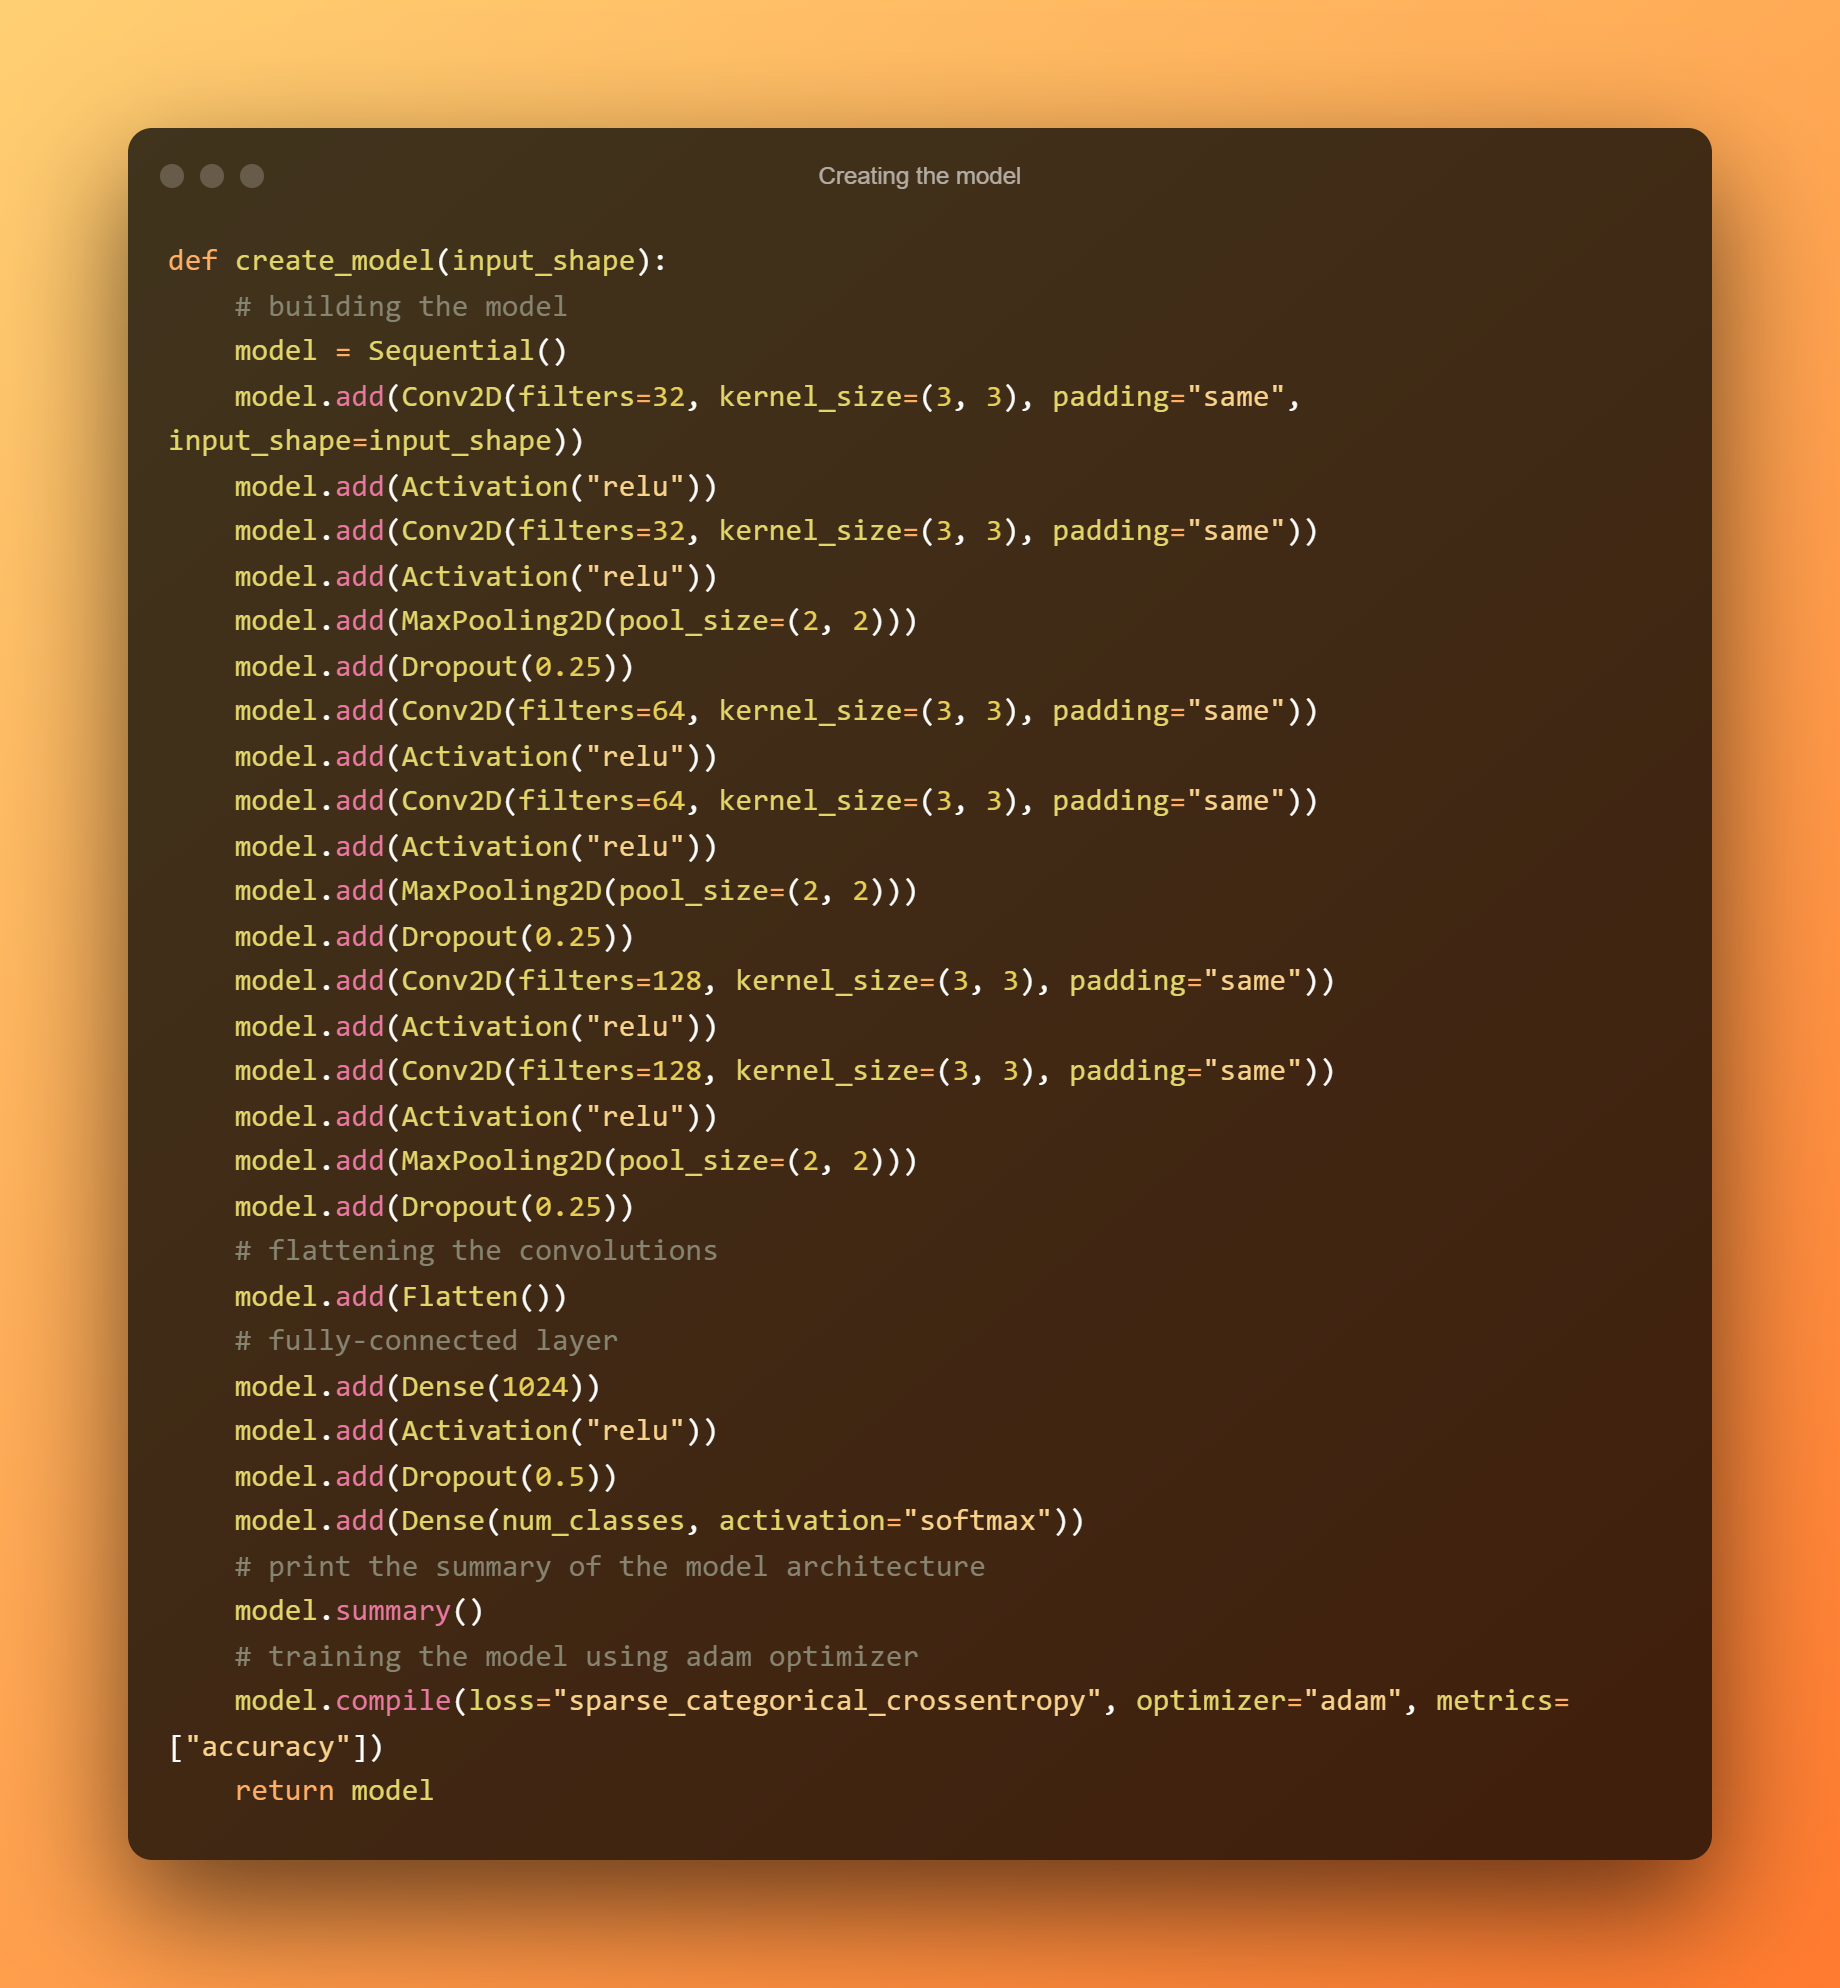
5. Creating the model
Now we’ll build three layers, each consisting of two ConvNets with a max-pooling and ReLU activation function, followed by a fully connected 1024-unit system. In comparison to ResNet50 or Xception, which are state-of-the-art models, this might be a comparatively tiny model.
6. Training the model
I used Tensorboard to measure the accuracy and loss in each epoch and provide us with a lovely display after importing the data and generating the model. Run the following code; depending on your CPU/GPU, training will take several minutes.
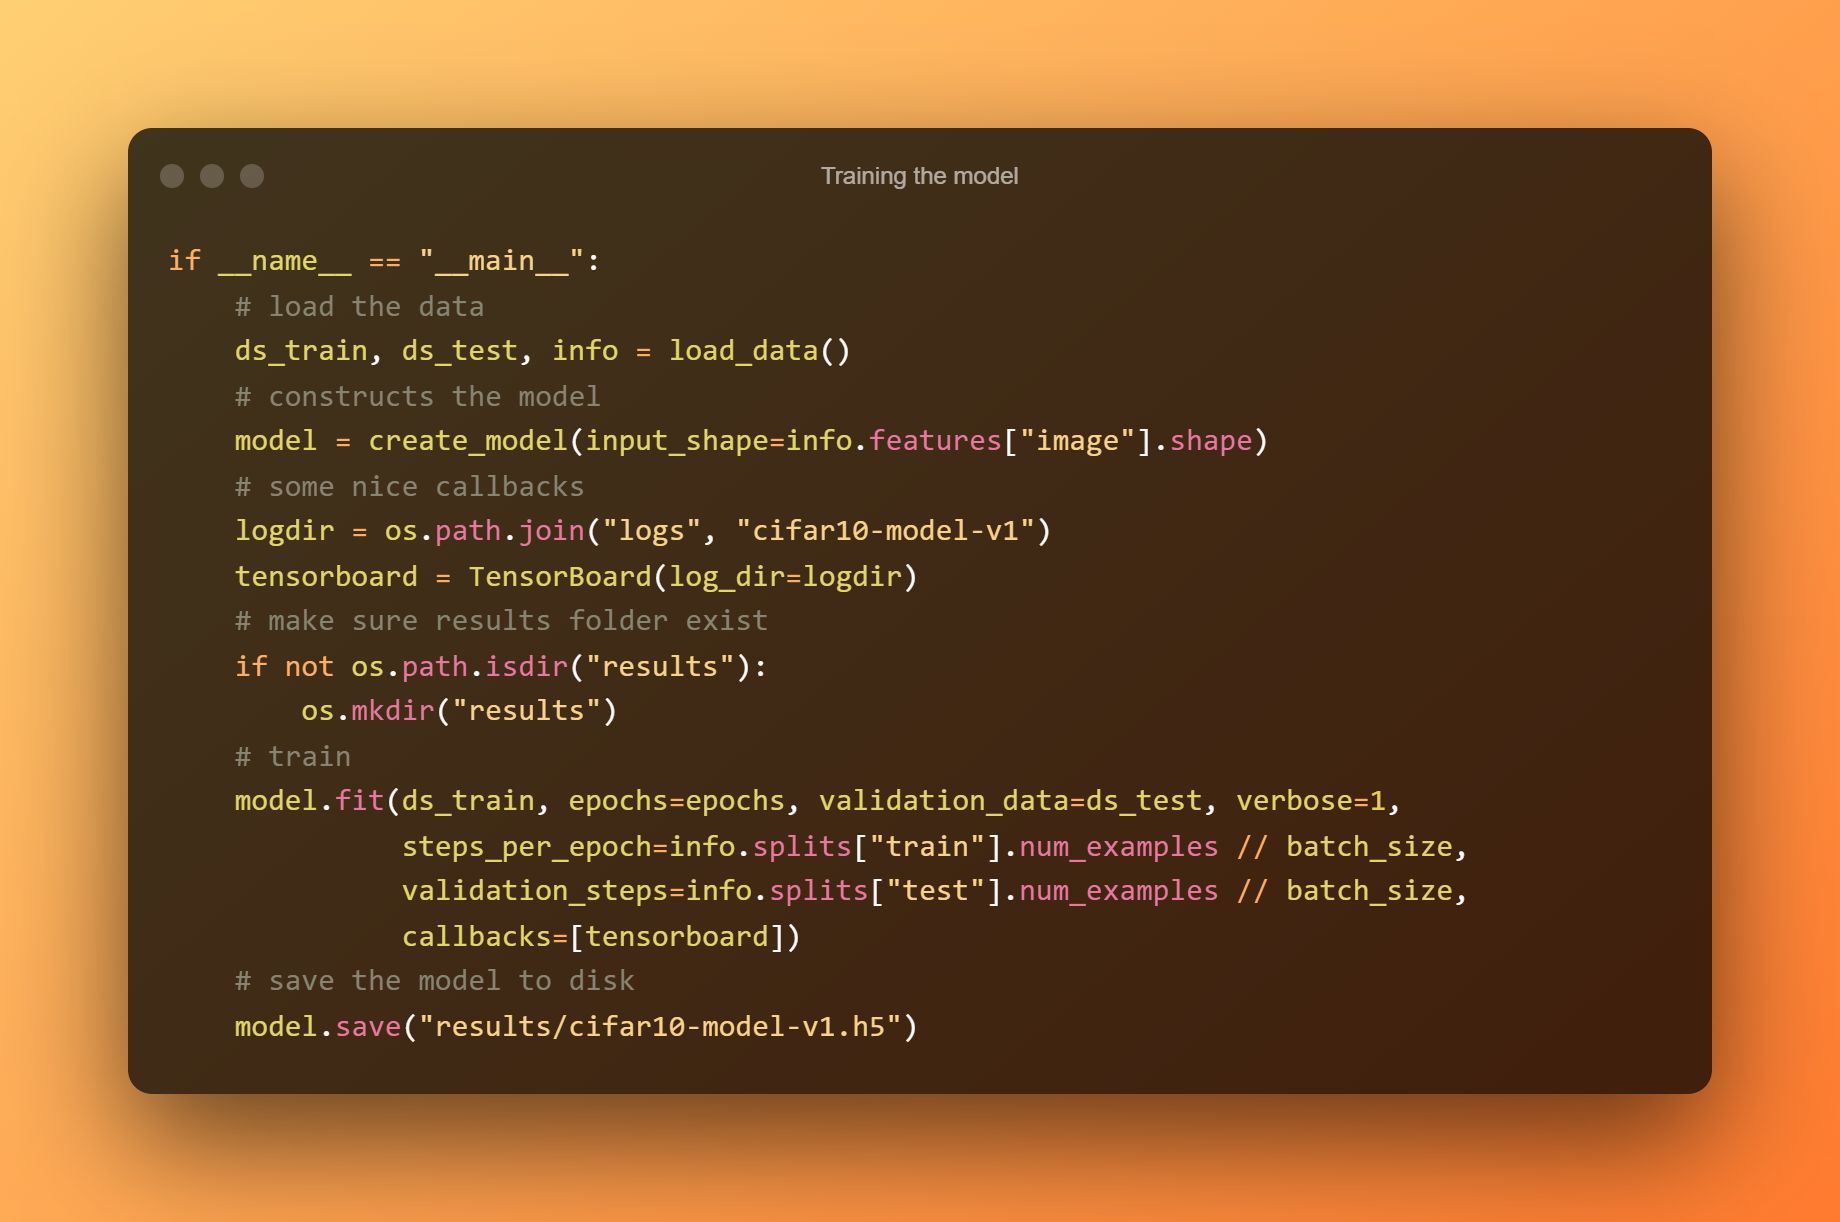
To use tensorboard, just type the following command in the terminal or command prompt in the current directory:

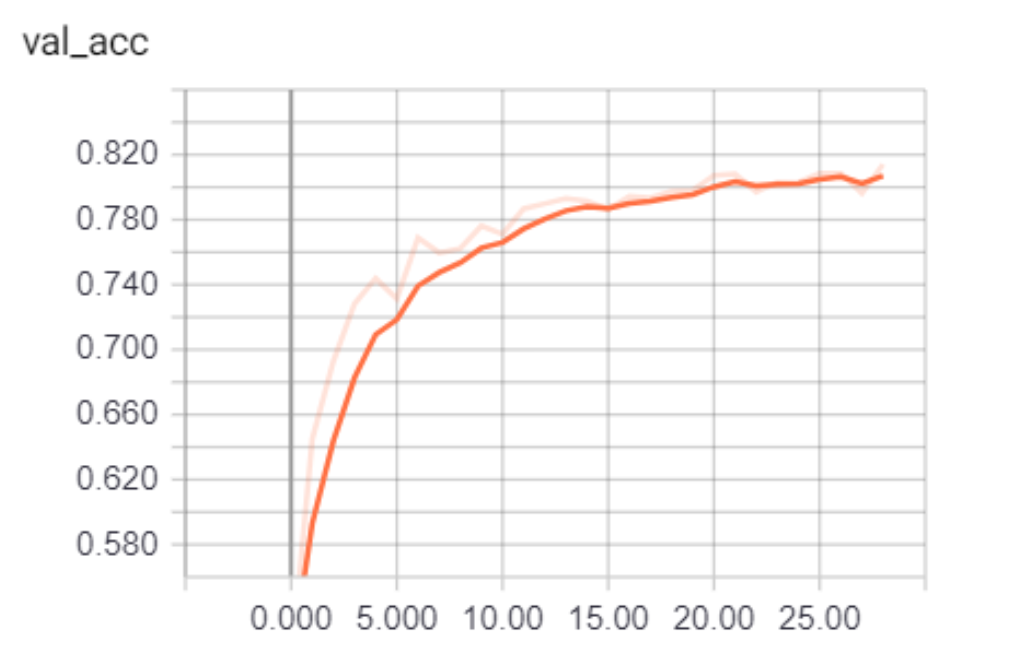
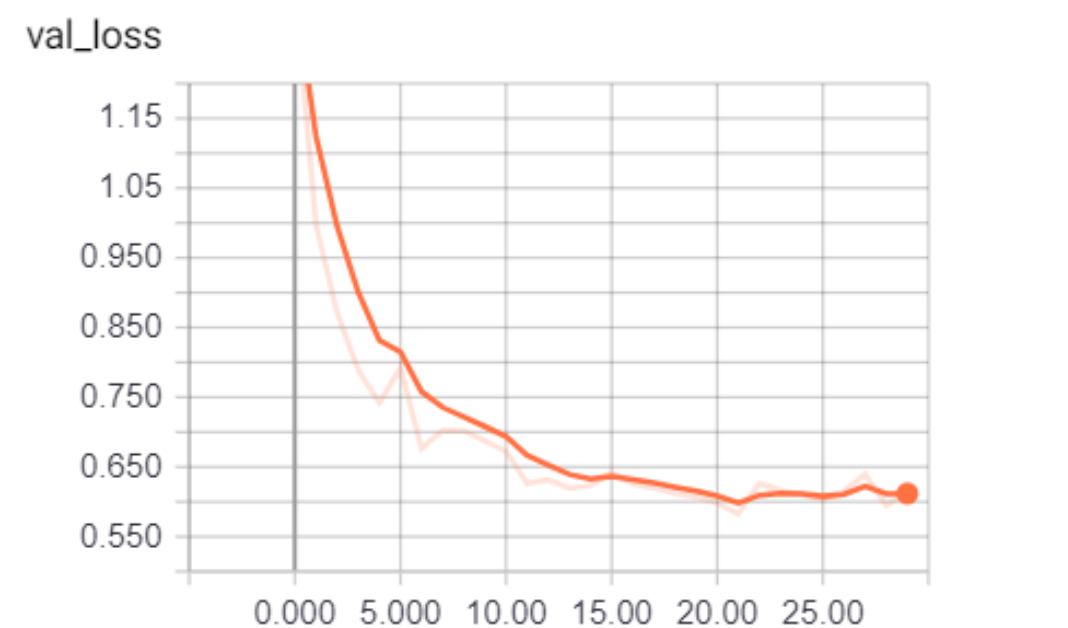
You’ll see that validation loss is reducing and accuracy is rising to about 81%. That’s fantastic!
Testing the model
When the training is finished, the final model and weights are saved in the results folder, allowing us to train once and make predictions whenever we choose. Follow the code in a new python file named test.py.
7. Importing the utilities for testing

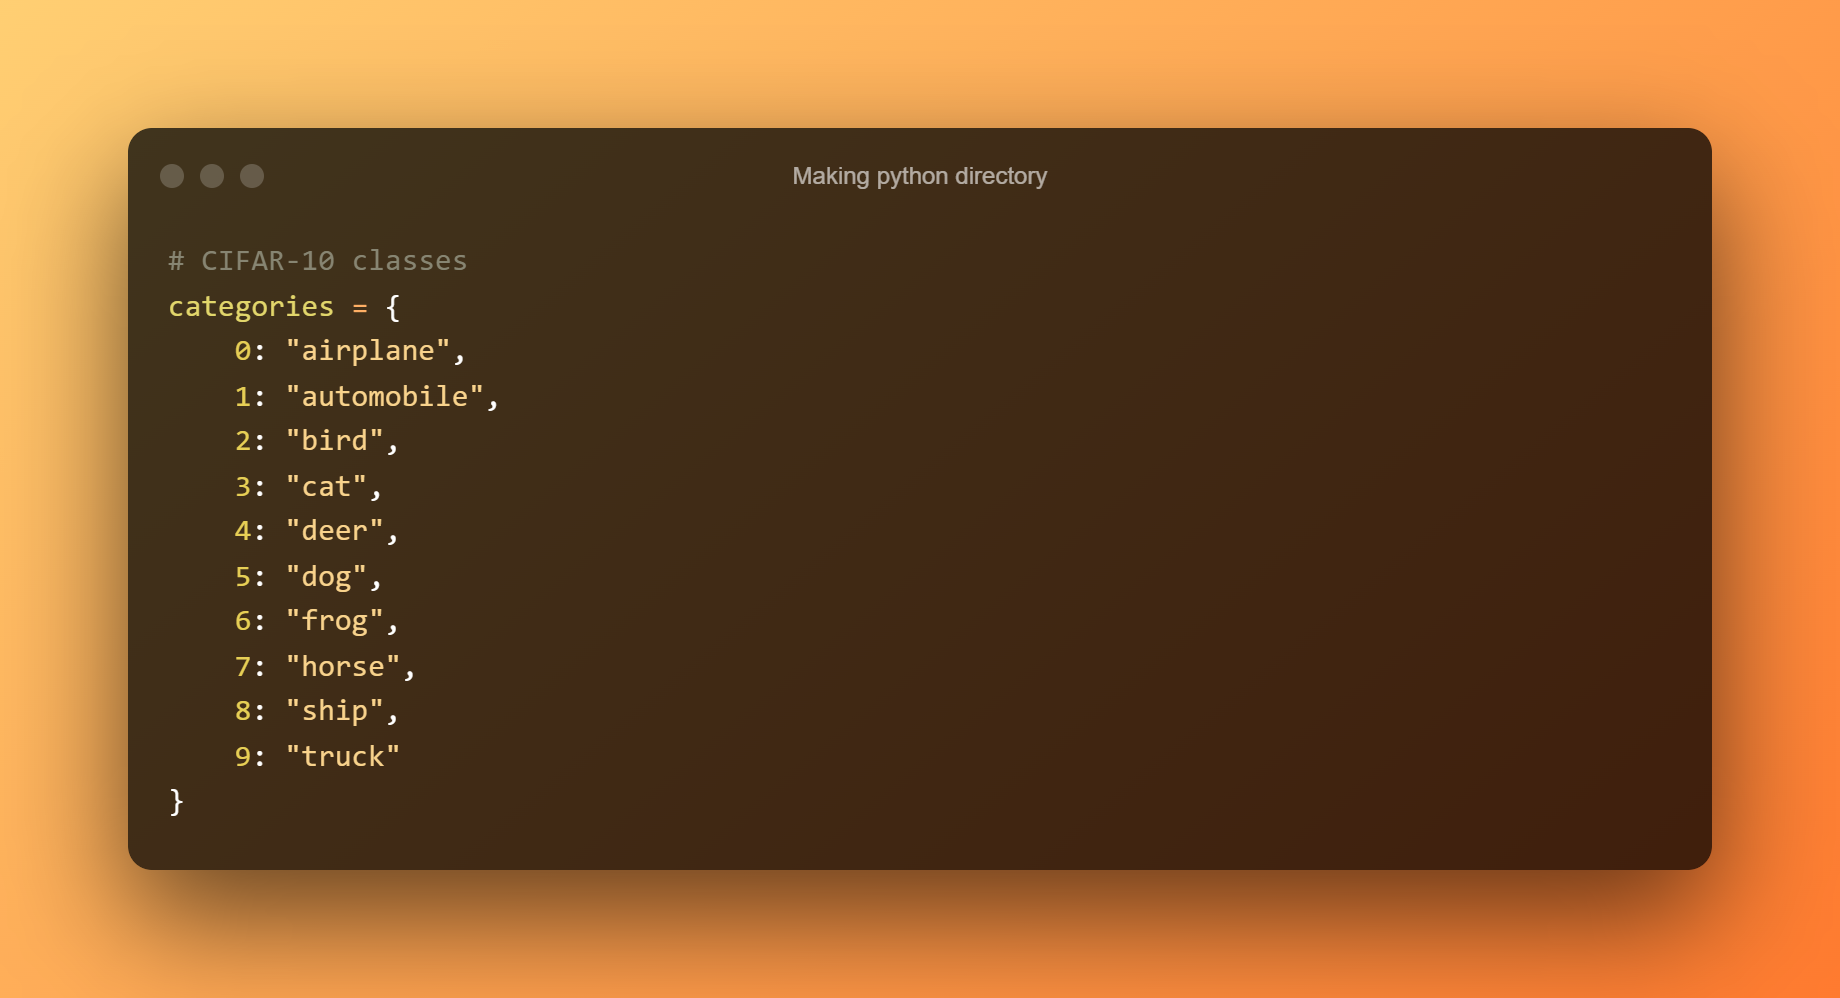
8. Making a python directory
Make a Python dictionary that translates each integer value to the dataset’s appropriate label:
9. Loading test data & model
The following code will load the test data and model.

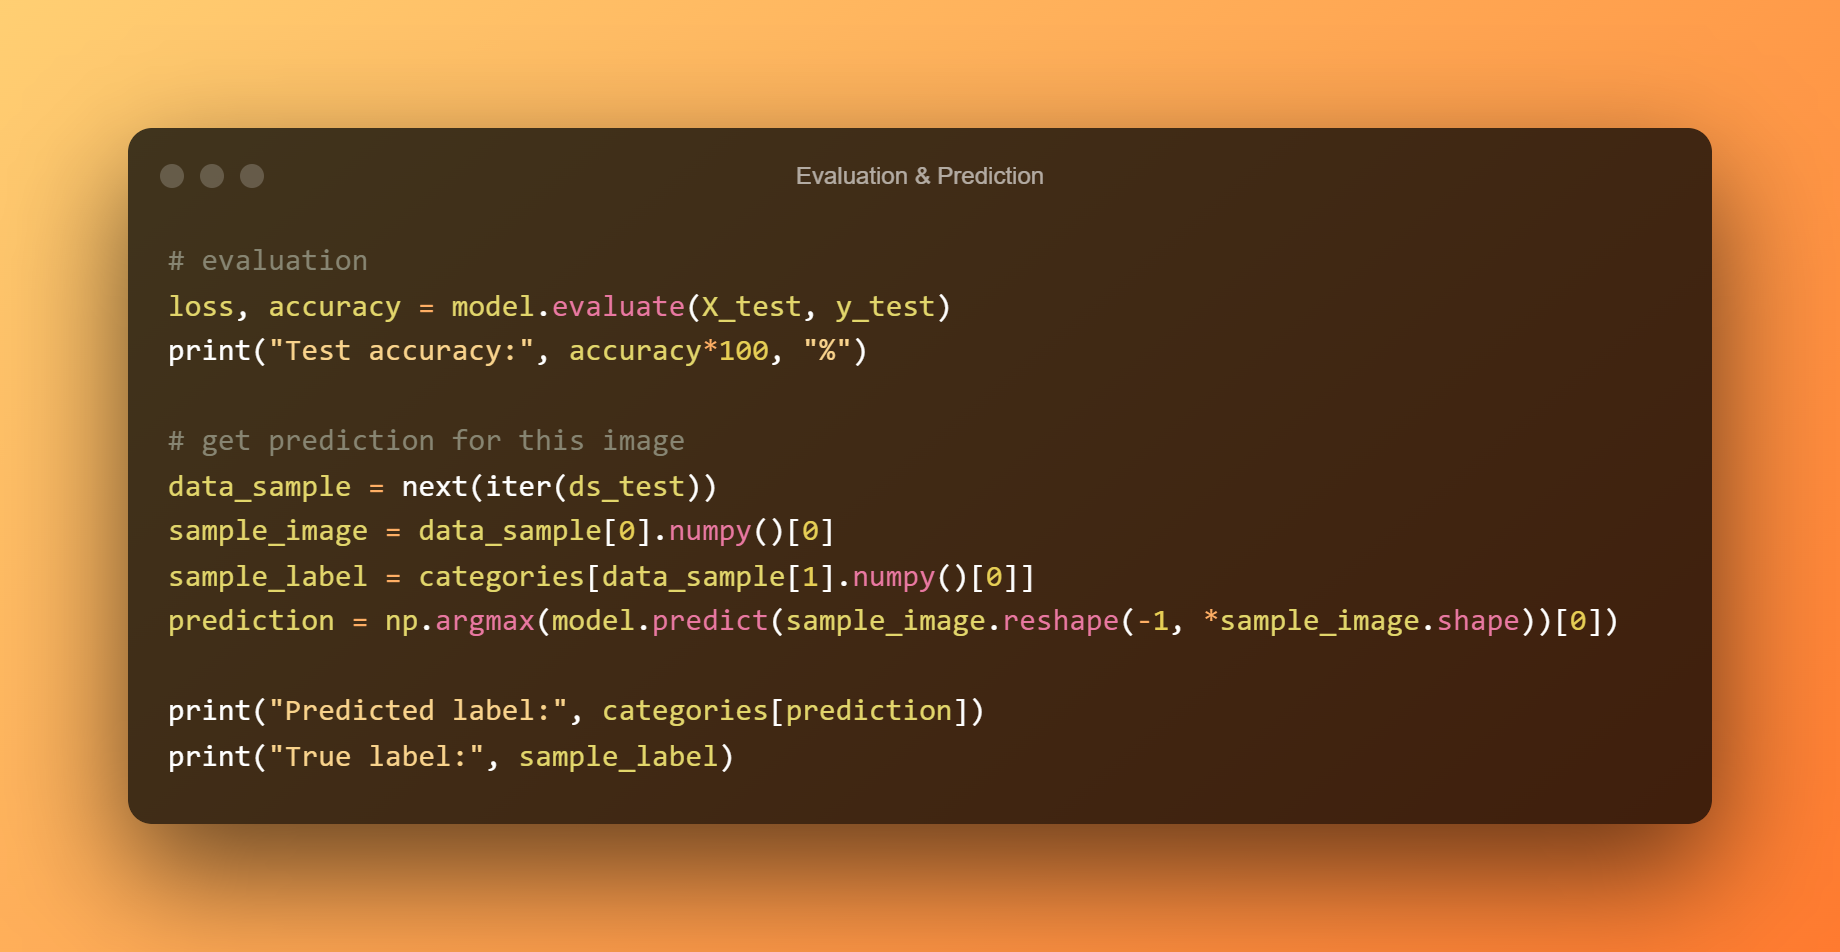
10. Evaluation & Prediction
The following code will evaluate and make predictions on the frog images.
11. Results
The model predicted the frog with 80.62% accuracy.

Conclusion
Okay, we’re done with this lesson. While 80.62% isn’t good for a little CNN, I strongly advise you to alter the model or look at ResNet50, Xception, or other cutting-edge models for better results.
Now that you’ve built your first image recognition network in Keras, you should experiment with the model to discover how different parameters impact its performance.

Leave a Reply